
Showing posts with label seed starting. Show all posts
Showing posts with label seed starting. Show all posts
Friday, February 8, 2013
Scallions From Seed

Tuesday, February 5, 2013
Chinese Broccoli - Kai Lan - Gai Lan

We planted some Chinese broccoli which is also called Kai Lan and Gai Lan. Chinese broccoli is a more delicate version of regular broccoli. The stalk is very thin with a small broccoli head and soft leaves. It's close in appearance to broccoli rabe but not in flavor since broccoli rabe tastes super bitter to me. You typically harvest the small head with a few inches of stalk and the top most leaves.
At restaurants it's steamed then sauted with
garlic. The leaves wilt down like spinich so you end up with this interesting dish that is like a few different veggies in one. It's wilted like spinich, has tiny heads like traditional broccoli and crunchy/tender stems too.


Wednesday, March 7, 2012
Seed Update - Borage


Friday, March 2, 2012
Seed Starting - Borage


Sunday, February 19, 2012
Seed Starting - Echinacea

My current fascination is with growing things that are ornamental as well as useful. The beautiful and medicinal echinacea plant meets the criteria. These seeds are from Baker Creek Heirloom Seeds and are one of a few packets purchased recently. The back of the packet recommends cold stratification to increase the germination rate. Huh? After a few quick internet searches, I discovered that some plants need the chilly, wet winter months to encourage the seeds to get started. Cold stratification is just a fancy way of saying that. Hmmm, so these babies need a cold, wet environment to wake up? OK, I can do that! In the refrigerator that is.
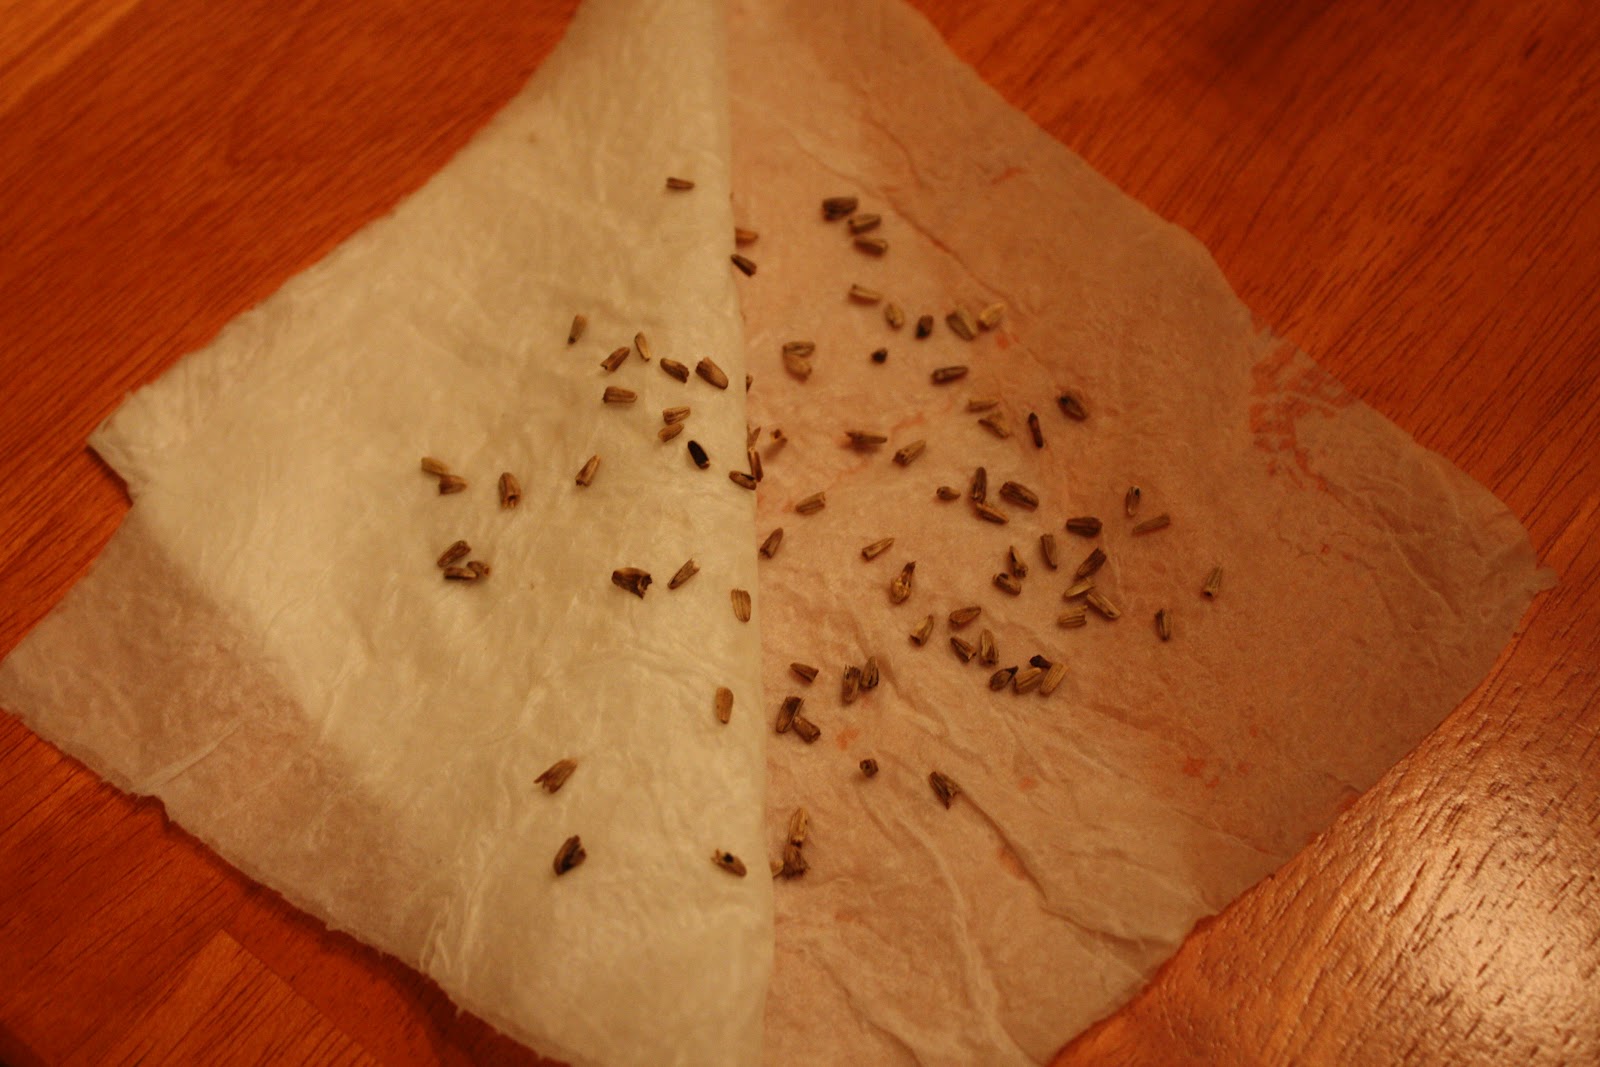
Here are the seeds in a nice moist paper towel ready to go into a zip top baggie and then into the chilly refrigerator.

I'm supposed to be checking on them every now and then to see if they're sprouting. As they spout, I'll plant them in some soil. One site online says the cold stratification process can take 3 months. Can that be right? That seems like a long time. I guess we'll see.......

Monday, January 23, 2012
How to Make Free Seed Starting Pots
I've been enjoying my seed starting experience immensely. Since I'm only doing a few, I'm using the pre-made Jiffy 2" peat pots that I purchased from Home Depot. They're $1.99 for 26 peat pots which makes them about 8 cents each. I saw a handy tutorial online about making your own seedling pots which may come in handy if I ever decide to start more than a handful of plants from seed. This is a cool crafty type project that has a useful purpose and could actually reduce your gardening expenses. It's a win - win- win situation!
You start out with a toilet paper or paper towel tube. This here is a paper towel tube:

Since I'm using the 2" peat pot, I was looking to see of a decent alternative could be made. In order to get the most similar size to the Jiffy 2" peat pot, you cut the tube into 2 and 3/4 inch sections like this:
 Now you need to close one of the ends so that it actually holds in the soil. You squish the tube in one direction then the other to make the circular tube into a square shaped tube. At each corner of your new square-ish shape, you cut a slit 3/4 inches in length. Below is a picture showing the 4 slits which in turn make the four flaps used for folding:
 The next step is to fold over the flaps to create the bottom of the seed pot. Fold the flaps just like you would fold the flaps of a cardboard box:
 Here is how your tube section looks in the very beginning and how it looks after folding all the flaps to create the bottom:
 Here is the pretty little Jiffy peat pot on the left and the homemade version on the right. They are nearly the same height but the peat pot flares out at the top and is a bit wider overall:

I thought I'd try to cut a toilet paper roll in half and see what I got, they're on the small side and measure 1 and 1/2 inches tall when finished:

Here are all of the pots lined up for comparison. The two on the left are what the toilet paper roll looks like if you just cut it in half to make 2 pots. They're much smaller than the store bought pot as you can see. The one that was measured out and made from the paper towel roll is a good substitute and looks quite similar in the line up below:

You start out with a toilet paper or paper towel tube. This here is a paper towel tube:

Since I'm using the 2" peat pot, I was looking to see of a decent alternative could be made. In order to get the most similar size to the Jiffy 2" peat pot, you cut the tube into 2 and 3/4 inch sections like this:


I thought I'd try to cut a toilet paper roll in half and see what I got, they're on the small side and measure 1 and 1/2 inches tall when finished:

Here are all of the pots lined up for comparison. The two on the left are what the toilet paper roll looks like if you just cut it in half to make 2 pots. They're much smaller than the store bought pot as you can see. The one that was measured out and made from the paper towel roll is a good substitute and looks quite similar in the line up below:

Subscribe to:
Posts (Atom)